Common Drainage Mistakes by Decks & Sidewalks (Fixed Right)
We walk through real-world drainage mistakes we see around decks and sidewalks, especially with culverts and town ditches, and how we fix them for good.
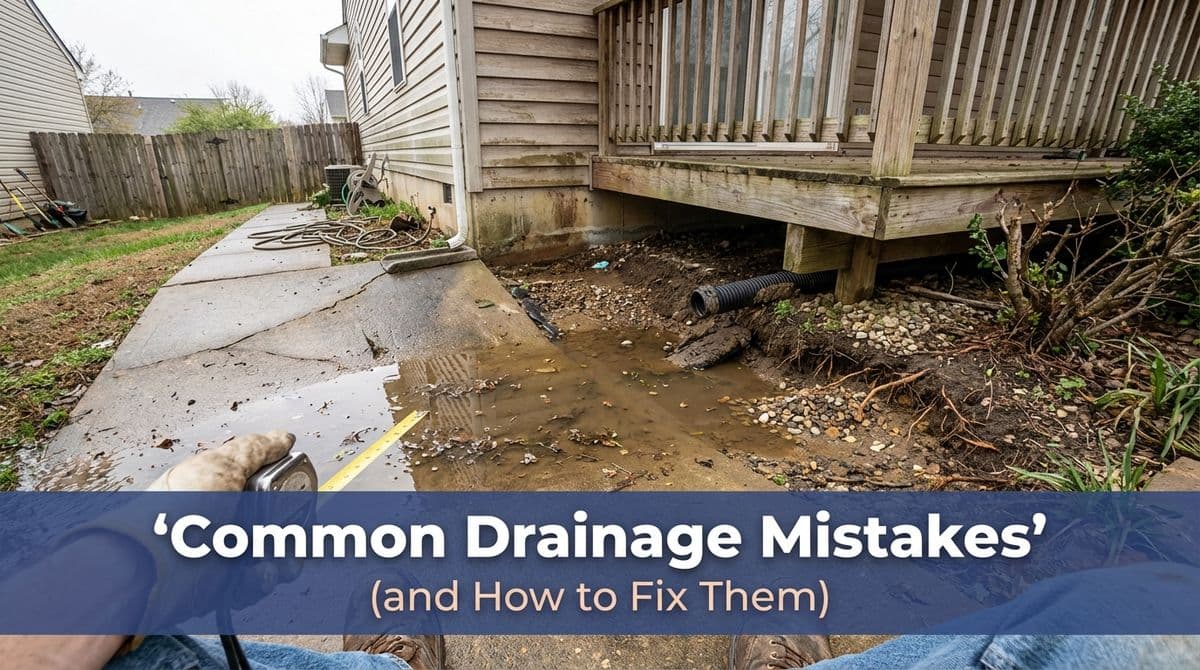
When Decks, Sidewalks, and Ditches Don’t Drain Right
We recently got a call from a homeowner — let’s call her Linda — who was at her wits’ end with water sneaking under her deck and lifting the sidewalk right next to it. A year earlier, she’d already paid another contractor to “fix” the problem based on an engineering report.
On that first project, the contractor ran drainage pipes from her yard into a roadside ditch that turned out to be a town-owned culvert. The town thought it belonged to the neighbor, the neighbor said it was the town’s, and meanwhile the ditch started flooding in storms when it never had before. By the time Linda called us, she had an engineering report, a drainage map from the town, and a deck and sidewalk still getting hammered by water.
We see situations like this a lot: drainage work that looks “professional” on the surface but ignores how water actually moves through the property — and who actually owns which part of the system. So we drove over, walked her yard, and used her story as a good teaching example of common drainage mistakes we run into around decks and sidewalks, especially where culverts and town ditches are involved.
How We Diagnose Drainage Around Decks and Walkways
When we get called for a problem like Linda’s, we don’t start with pipe sizes or fancy products. On our jobs, we always start with three basic questions:
- Where is the water coming from? (roof, uphill neighbor, driveway, town road, groundwater?)
- Where is it supposed to go? (culvert, swale, storm drain, soakaway area?)
- Who owns that final outlet? (you, neighbor, HOA, or the town?)
In Linda’s case, our walkthrough and her drainage map confirmed what we see often: the outlet was a town-owned roadside ditch/culvert, and the previous contractor had tied into it without ever checking the slope or getting clarity from the town.
We often get called when homeowners are focused on the obvious symptom — the heaved sidewalk or the soggy spot by the deck — but not the overall path the water is taking. From experience, we’ve learned that if that big-picture path isn’t right, no amount of French drains or extra pipes will hold up long-term.
Common Drainage Mistakes We See Around Decks and Sidewalks
1. Drains Installed “Backwards” Into Culverts
What went wrong at Linda’s home is something we run into more than you’d think. The contractor ran the yard drains into the culvert upstream instead of downstream. In heavy rain, the ditch filled up, and instead of carrying water away, it backed up toward the yard and sidewalk.
On our projects, we always verify culvert flow on site — not just by guessing. We’ll look for:
- Which way the ditch slopes along the road
- Existing town inlets or outlets
- Erosion patterns that show past flow direction
Once we know which way the water is supposed to move, we make sure any tie-in is placed on the downstream side, so your system is helping the culvert, not fighting it.
2. Ignoring Slope Right Next to the Deck or Walk
We also see sidewalks and deck stairs poured flat or even back-pitched toward the house or posts. That sends surface water straight to the spot you’re trying to protect instead of away from it.
On our installs and repairs, we aim for:
- Sidewalk pitch: about 1/8" to 1/4" per foot away from the house or deck
- Soil grading: first 5–10 feet around the deck sloped away at roughly 5% (about 6" of drop over 10 feet)
We’ve found that even a small correction in slope right at the surface can dramatically reduce how much water ever reaches a drain line in the first place.
3. Tying Into Town-Owned Ditches Without Coordination
Another pattern we see: a past contractor quietly cuts into a town ditch or culvert, hoping no one notices. Then, when something floods, the finger-pointing starts between homeowner, neighbor, and municipality.
On our drainage jobs, if the outlet touches a public ditch, pipe, or catch basin, we recommend:
- Requesting a drainage map from the town before any work (just like Linda eventually did)
- Confirming in writing that you’re allowed to connect at the chosen point
- Making sure our design doesn’t overload or block that system
We’ve learned that a 10-minute phone call with the town can prevent years of headaches — and sometimes even fines or forced removals.
How We Fix These Drainage Problems in the Field
Step 1: Walk the Site Like Water Would
When we visited Linda’s property, we didn’t head straight for the pipes. First, we walked the yard after a rain event, looking for stains on concrete, washed-out mulch, and low spots. On our projects, we treat that site walk as the “story of where the water’s been.”
Only after we understand that story do we start talking about specific fixes.
Step 2: Correct Slopes Before Adding More Pipe
We’ve found that homeowners are often sold more drains when what they really need is better grading. Around decks and sidewalks, we typically:
- Regrade soil so it gently sheds water away from the structure
- Adjust or replace sections of sidewalk that are back-pitched
- Add a shallow swale (a grassed “valley”) to steer water toward a safe outlet
By doing this first, any drain lines we install later are just backup — not the only thing keeping water out from under the deck.
Step 3: Rebuild the Connection to Culverts the Right Way
When we repair bad culvert tie-ins, our process usually looks like this:
- Verify flow direction and elevation with a level or laser, not guesswork.
- Remove the old, poorly placed tie-in that’s causing backups.
- Install new solid pipe with consistent slope (typically 1%–2% drop) from the collection point to the culvert.
- Connect at the correct downstream point with a proper fitting or headwall, so debris can’t easily clog the opening.
On our jobs, we’ll also clean up any disturbed areas, stabilize the ditch bank with stone or vegetation, and make sure we’re not creating erosion problems for the town or neighbors.
Simple Checks Homeowners Can Do Before Calling Us
Even though we handle the technical side, there are a few quick things you can check yourself that we often walk homeowners through over the phone:
- Look at storm patterns: After a good rain, note exactly where water is pooling around your deck or sidewalk.
- Check visible slopes: Does the soil or concrete lean toward the house or deck posts? If so, that’s a red flag.
- Locate your outlets: Find where downspouts, French drains, or yard drains actually daylight or connect to a ditch.
- Identify ownership: If a ditch or pipe is near the road, ask the town for a drainage map so you know who’s responsible.
When you call us with that information in hand, we can usually zero in on the cause — and the right fix — much faster.
When to Bring in a Drainage Pro
We love when homeowners are proactive, but there are times when DIY grading or pipe work can make things worse, especially around decks, sidewalks, and town-owned ditches. If you’re seeing repeated sidewalk lifting, water under your deck, or a ditch that suddenly floods after work was done, that’s our cue to step in.
On our end, we’ll read your engineering reports if you have them, review any town maps, walk the property with you, and design a solution that works with your existing culverts and slopes — not against them. That’s how we turn persistent, confusing drainage problems into quiet, well-behaved systems you don’t have to think about every time it rains.